
You have put the last stitch in. Before you frame it or put it in a hoop, a quick wash and press makes a real difference: hoop creases relax, the fabric brightens, and the stitches look plump and even. It is simple, as long as you do it gently and keep an eye on strong colors.
Do you need to wash it?
Not always. If the piece is clean and smooth, a careful press is enough. Wash it if you can see hoop marks, creases that will not press out, a grubby edge, or pencil marks from the chart. Pieces that took months usually benefit from a wash: hands leave oils on fabric, even clean hands.
Before you start: test the strong colors
Modern stranded cotton such as DMC is made to be colorfast, but deep reds, dark blues and hand-dyed threads can occasionally bleed. Wet a spare strand of each strong color, press it on a white paper towel, and see if any color comes off. If it does, use cold water only and keep the wash short.
How to wash cross stitch by hand
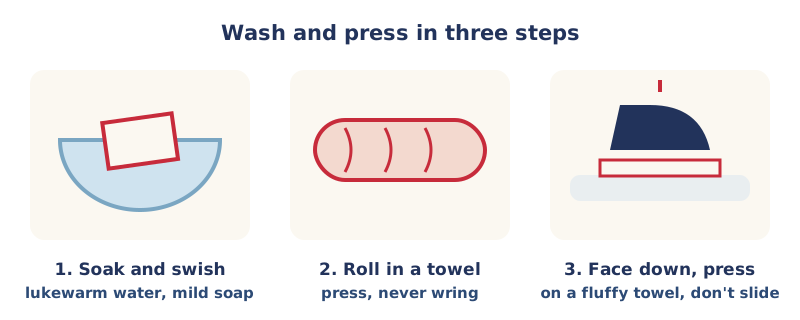
- Fill a clean bowl with lukewarm water and add a few drops of a mild, bleach-free liquid soap. Gentle hand-wash or baby shampoo both work.
- Put the piece in and let it soak for a few minutes. Swish it around gently; do not rub or scrub the stitches.
- Lift it out and rinse in cool, clean water. Change the water and rinse again until there are no bubbles.
- Do not wring it. Lay it flat on a clean white towel, roll the towel up and press on the roll to soak up the water.
If a color starts to run
Do not let the piece dry. Drying while dye is loose is what sets a stain. Keep it wet and keep rinsing in cold water, changing the water often, until it stays clear. A color-catcher sheet from the laundry aisle in the bowl helps pick up loose dye. Most small bleeds rinse out completely if you act straight away.
How to iron cross stitch
- Fold a thick, fluffy towel on the ironing board.
- Lay the piece face down on the towel while it is still slightly damp.
- Cover it with a thin cotton cloth, such as a clean handkerchief.
- Set the iron to medium and press: put the iron down, lift it, move it, put it down again. Do not slide it back and forth.
- Let it dry flat before you frame it or finish it.
The fluffy towel is the secret. The stitches sink into it, so the fabric gets flat while the stitches stay raised instead of being squashed.
Things to watch out for
- Water-soluble pen: rinse every mark out in cold water before ironing. Heat can set the marks for good.
- Metallic thread and blending filament: use a low iron setting. These threads can melt.
- Beads and buttons: wash gently and keep the iron off them. Sew buttons on after washing if you can.
- Drying: flat, away from direct sun and radiators. Never in a tumble dryer.
Storing finished pieces
If you are not framing it straight away, roll it around a cardboard tube with the stitches facing out, or lay it flat between sheets of acid-free tissue paper. Folding leaves creases that are hard to get out later.
🎓 Stitch Club members do a before and after wash of their practice piece and earn the Wash Day badge. See Week 7 of Cross Stitch School
Frequently asked questions
Can you wash cross stitch in a washing machine?
It is safer to wash it by hand. A machine can tangle loose threads, rub the stitches and crease the fabric.
What soap is best for washing cross stitch?
A mild, bleach-free liquid soap: a gentle hand-wash liquid or baby shampoo. Use only a few drops.
Should I iron cross stitch on the front or back?
On the back. Lay it face down on a fluffy towel and press through a thin cloth so the stitches stay raised.
Why did my red thread bleed?
Deep colors and hand-dyed threads can release dye in warm water. Keep the piece wet and rinse in cold water until the water stays clear.